Alastair D’Silva is running what looks to be a very well prepared home automation tutorial at LCA2019 based on Home Assistant. I offered to have a hack on the support for GPIO pins on OrangePi boards in Home Assistant because it sounded interesting for a vacation week. The only catch being that I’d never done anything with GPIO pins at all on either Raspberry Pi or Orange Pi.
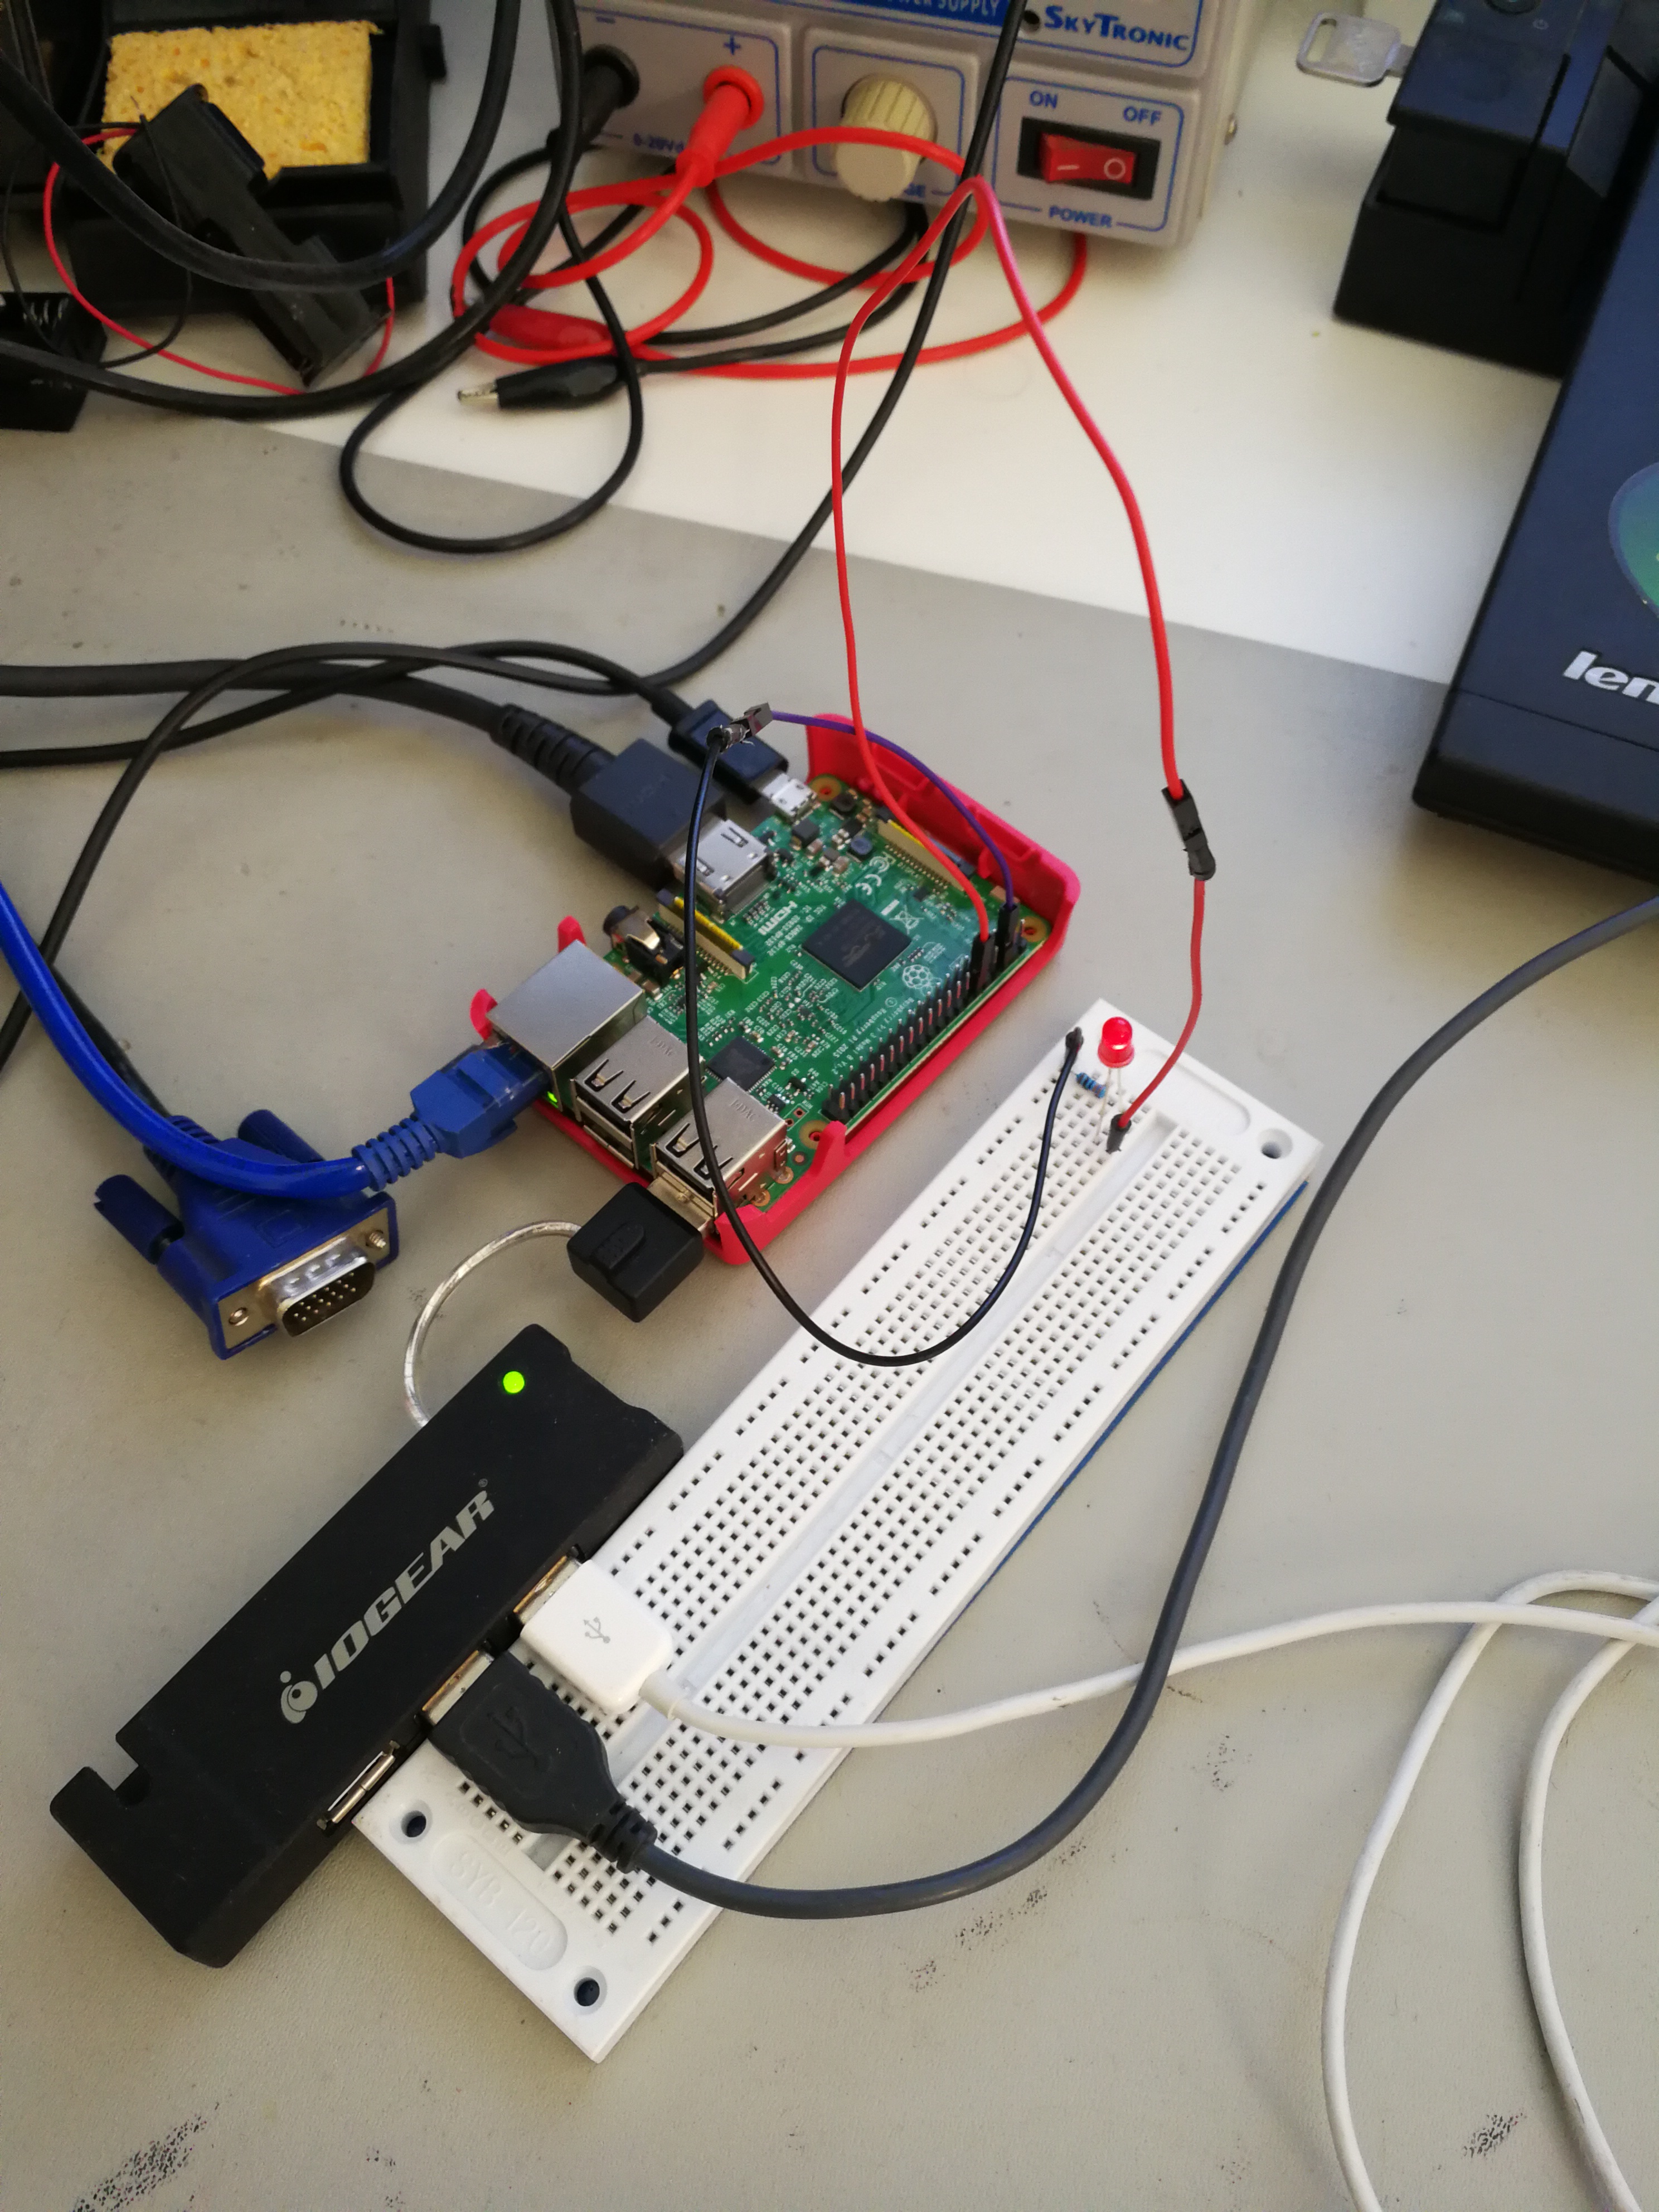 The first step seemed to be to get GPIO working at all on a Raspberry Pi (which is currently supported out of the box with Home Assistant). This online tutorial has a simple example of a circuit and the associated python code to blink a LED on a Raspberry Pi, so off I went to build that circuit.
The circuit has a LED with a 330 ohm pull up resistor on GPIO pin 18 on the board. The sample python code on the page above just blinks that LED, which I used to make sure that the circuit as working as intended.
To configure the GPIO pin as a switch in Home Assistant, I added the following to configuration.yaml (noting that the empty rpi_gpio entry isn’t strictly required, but will be later):
rpi_gpio:

switch:
 - platform: rpi_gpio
   ports:
     18: LED
Which leaves me with something like this in the web UI:
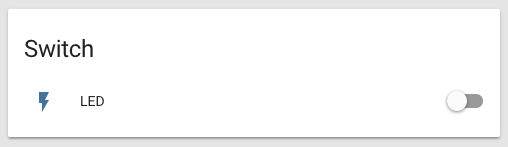
It even works!
I’ve lied to you a little bit above, for which I apologise. I’ve also been working on helping Alastair with adding Orange Pi to the rpi_gpio component in Home Assistant, as the tutorial is based on Orange Pi Primes, with a custom home automation shield installed. Now that I have a sample configuration that works for Raspberry Pi and a test circuit, its time to make sure that Orange Pi works correctly too.
Home Assistant doesn’t currently have any support for Orange Pi GPIOs. The first approach I took was to forward port this ancient patch which adds Orange Pis as a new component beside Raspberry Pis. That port is available here, but in the end I decided it would be nicer to just have the existing Raspberry Pi component also support Orange Pis, instead of duplicating a whole bunch of code and adding some confusion.
(It should be noted that there are downsides to this new approach — the code is more complicated this way, and Raspberry Pi owners need to download the Orange Pi GPIO library even though they’ll never use it. That said, I see these downsides as relatively minor).
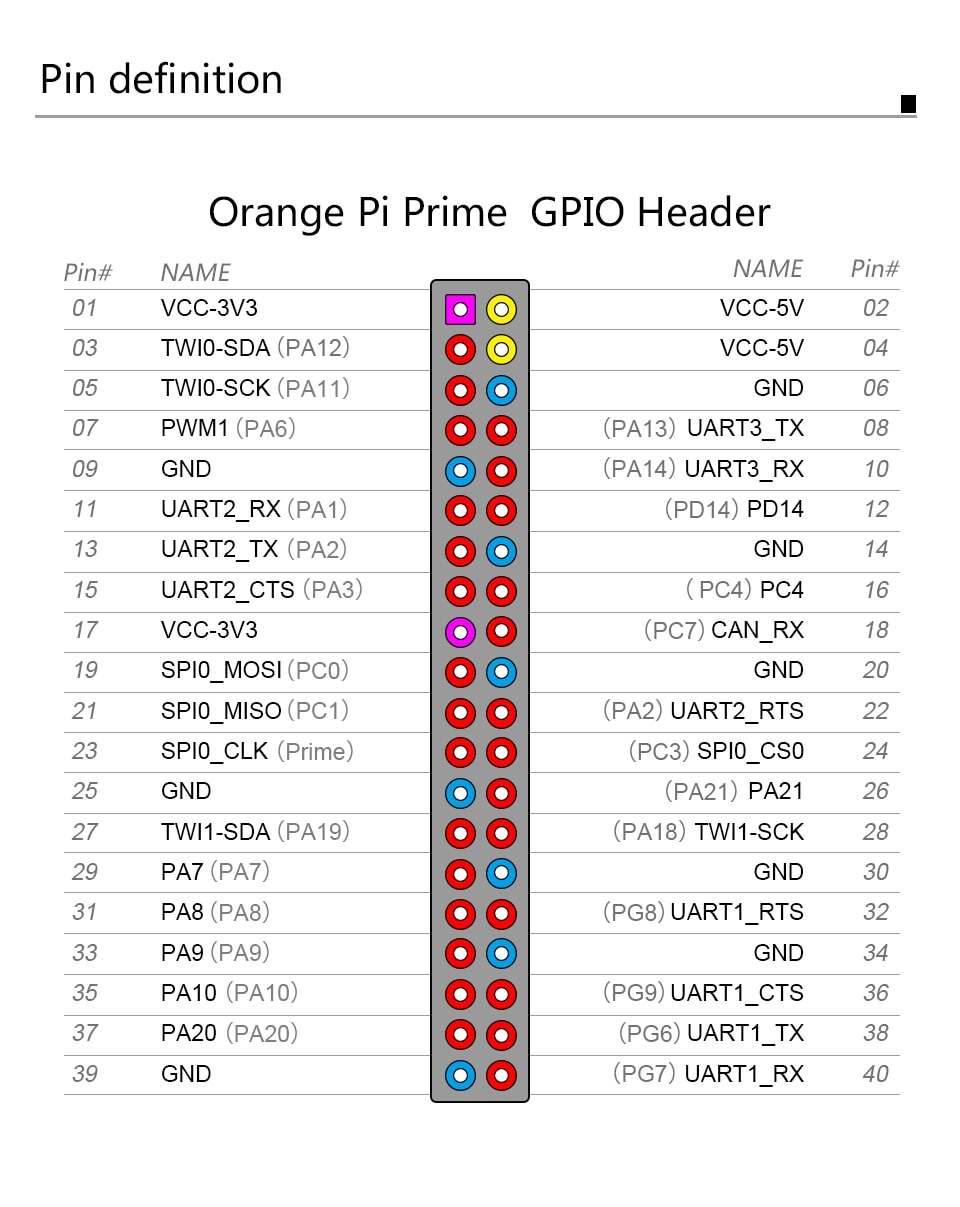 A small hitch however. Orange Pi names the GPIO ports in a quite different way from how Raspberry Pi does, and this took some time to get used to. The mapping of GPIO pins was a little hard to find, so I’ll include it here (the image to the left). A second hitch was that I needed a linux image for the board. I’ve used Armbian Stretch, as the hass.io image is quite locked down (no ssh to the base OS for example).
Based on the pin image instead of the Pin 18 from the previous example, I moved to what is labelled on the tutorial shield as “PA7”, and which is referred to in code as Pin 29.
The code for blinking is a bit different from the example linked above, so here is a tweaked version:
import OPi.GPIO as GPIO
import time


GPIO.setboard(GPIO.PRIME)
GPIO.setmode(GPIO.BOARD)
GPIO.setwarnings(False)
GPIO.setup(29, GPIO.OUT)

while True:
    GPIO.output(29, GPIO.HIGH)
    time.sleep(1)
    GPIO.output(29, GPIO.LOW)
    time.sleep(1)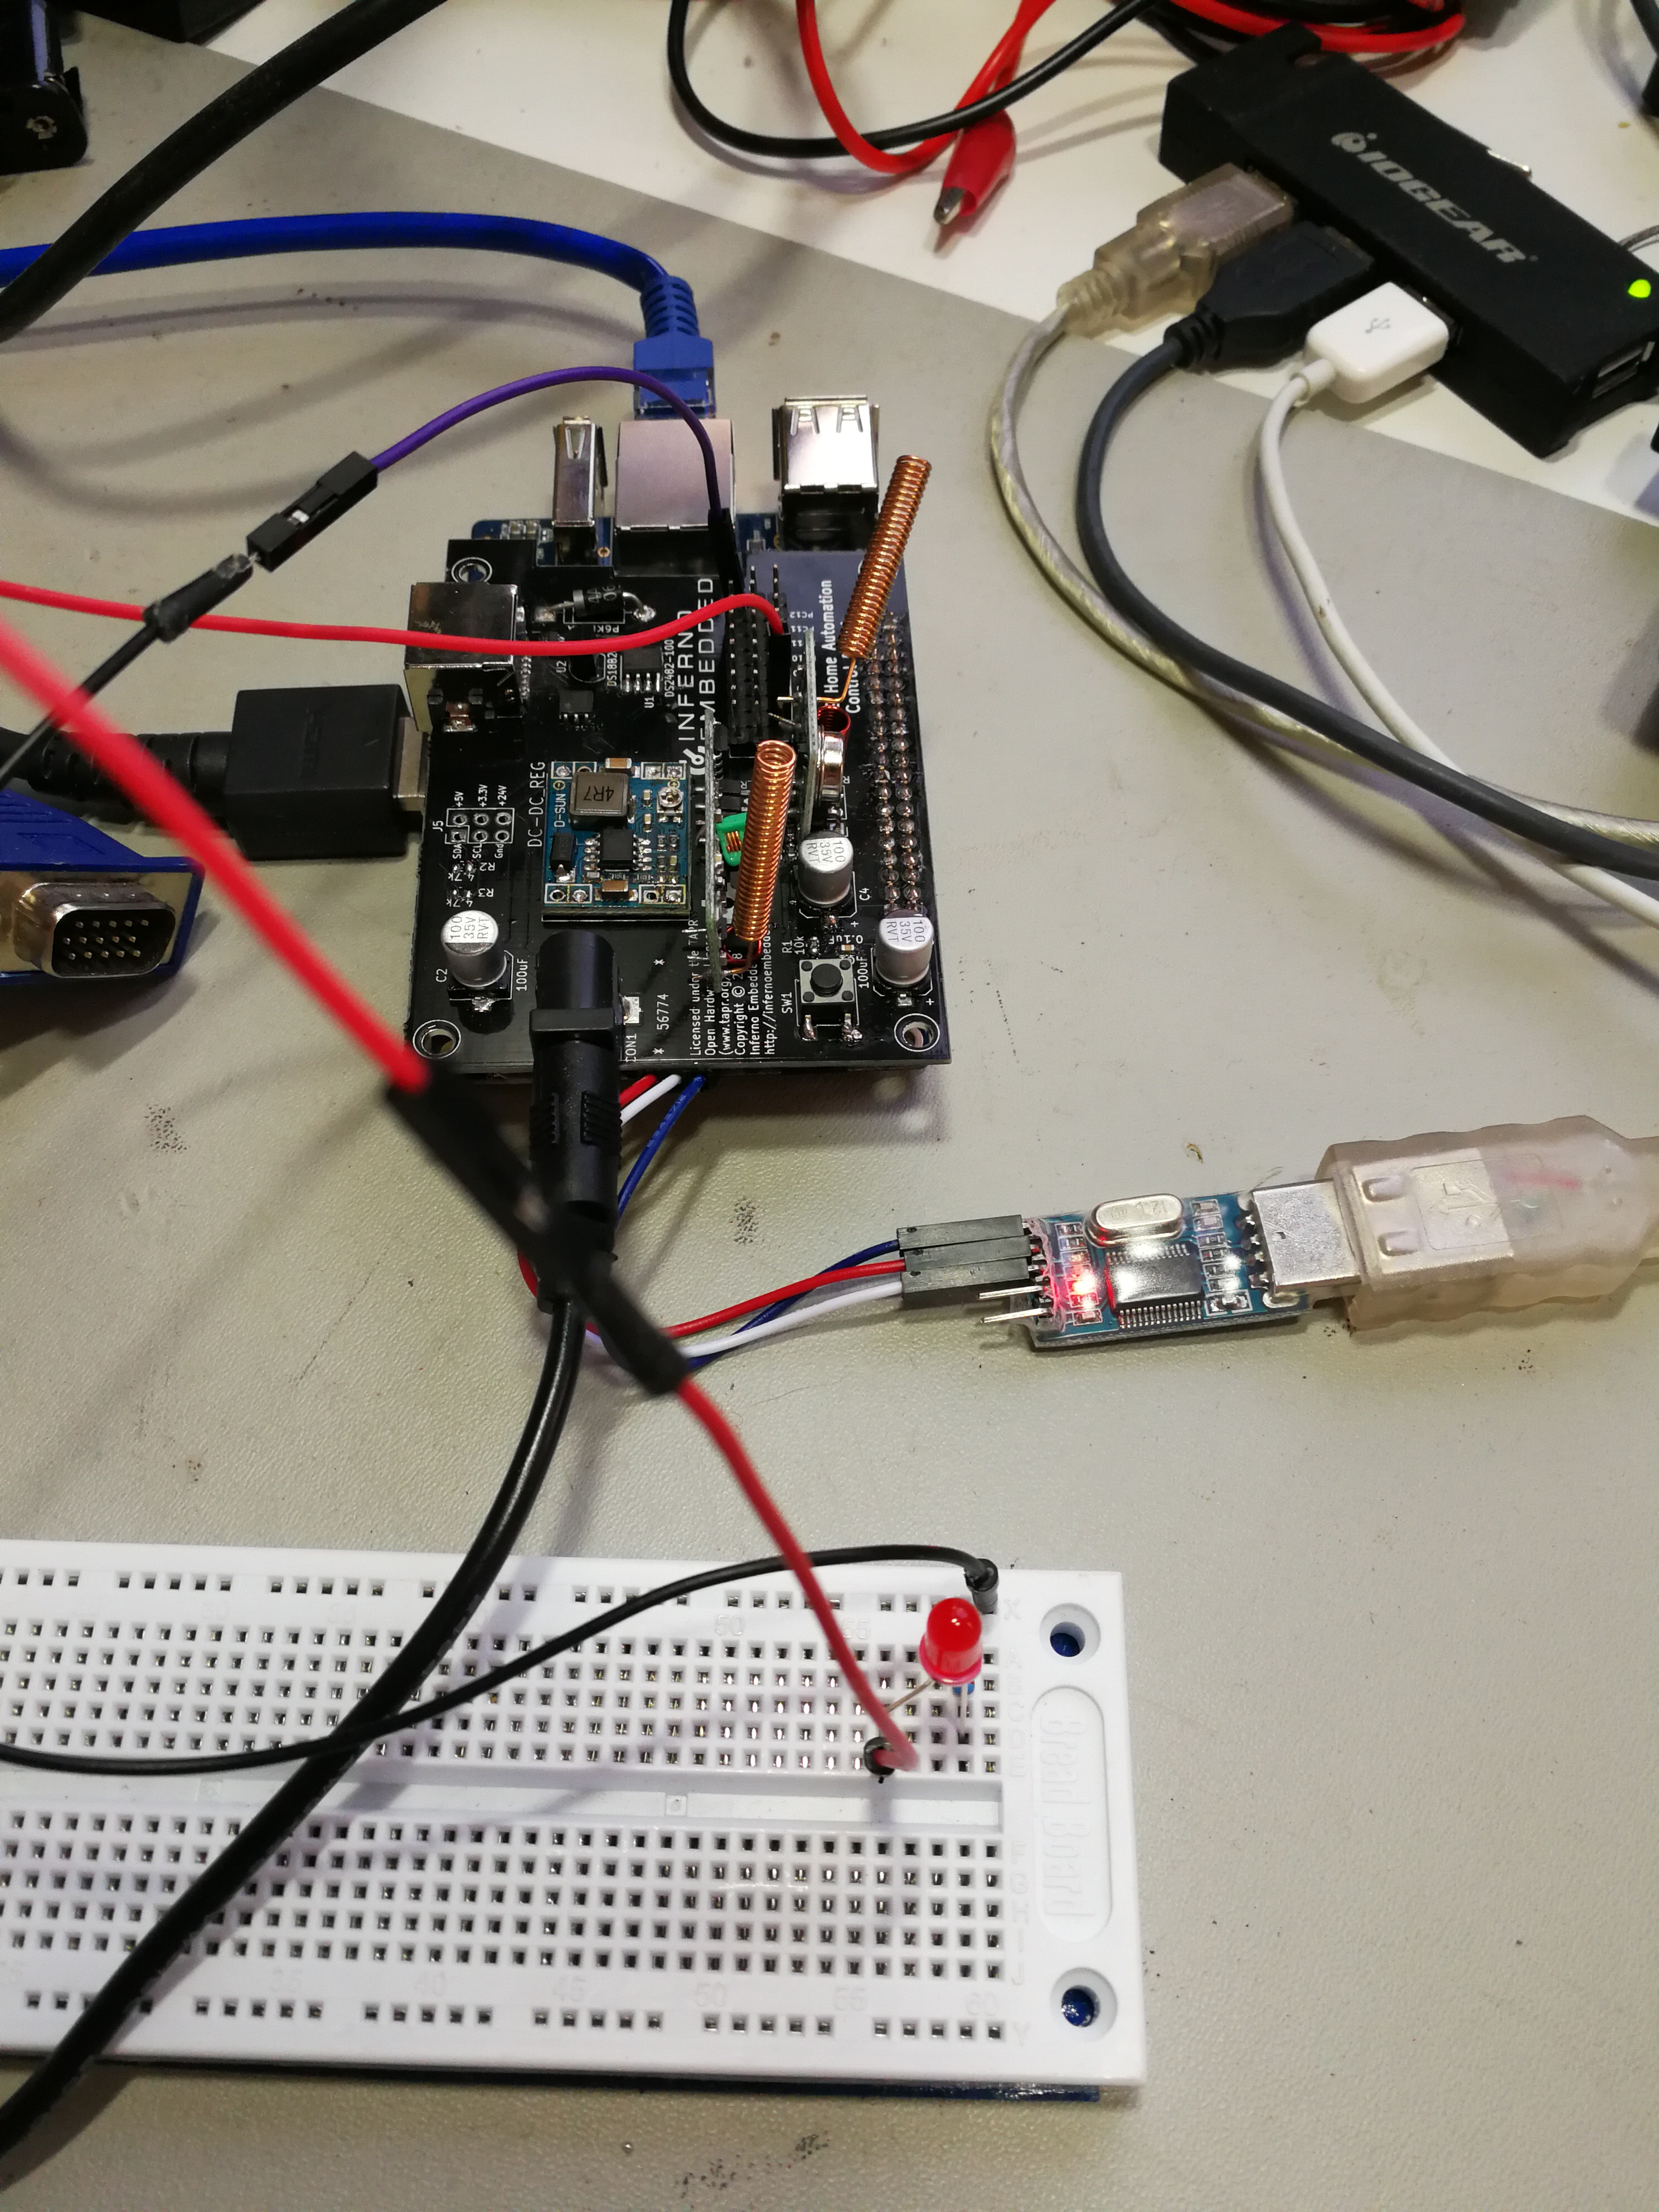
Note here that we need to specify what board we’re on (in this case a Prime), and we set the mode differently than the linked example.
So now let’s be over achievers and get things working in Home Assistant too! We need a configuration.yaml which includes something like this:
rpi_gpio:
  board_family: orange_pi
  board: prime

switch:
 - platform: rpi_gpio
   ports:
     29: LED
Note the additional config in the rpi_gpio entry. We also need to run hass as root, because OrangePi GPIO support requires access to /dev/mem for reasons I haven’t dug into just yet.
OrangePi GPIO support currently requires a patch to Home Assistant, which you can find at a github branch.
Pingback: Further adventures in Home Assistant OrangePi GPIO – Made by Mikal
Pingback: GPIO inputs on Raspberry Pi – Made by Mikal
Pingback: Updated examples for OrangePi GPIOs – Made by Mikal